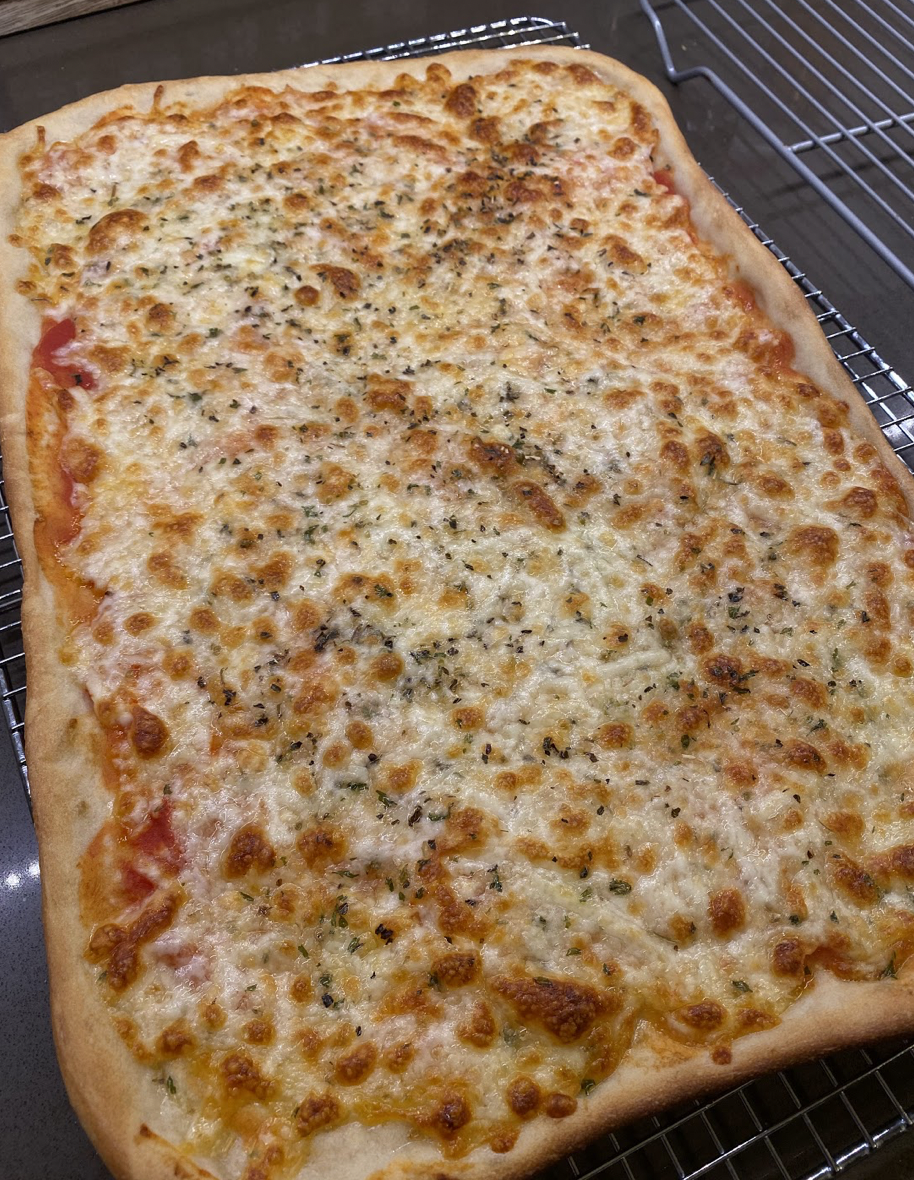
Easy No Knead Pizza Dough
This recipe yields 2- 9'“x13” pizzas
Welcome aboard friends. First off, if you have ever read any of my cooking/baking related posts- you know I insist on using a scale. Most of the time you can get away with it, but with pizza you MUST use a scale. This is all based off percentages. My pizza dough is a 67% hydration dough. This makes it consistent and easier to scale up/down. That means for whatever amount of flour I use, I add in 67% of the weight in water. Higher hydration doughs lead to fluffier/bubblier/lighter (80-95%) doughs. Lower hydration is more cracker/tavern style (~45%).
This dough needs a minimum of 24 hours in the fridge and a maximum of 5 days in the fridge. Just like cookies, the longer this sits in the fridge the more flavor you get in the dough. Just no longer than 5 days. I like to make my dough Tuesday night for Pizza Friday.
To kick this off you’ll need a bowl, kitchen scale, mixing tool of choice.
525 grams flour
352 grams water
5 grams Active Dry Yeast
5 grams sugar
Pinch of salt
Olive oil
Making the Dough
Add 352 grams of water to your bowl. Throw it in the microwave for ~30 seconds. You want the water at about 100* F. Not too hot or you’ll kill the yeast.
Add in the 5 grams of yeast and 5 grams of sugar. Stir it up and let it sit for about 10 minutes. This is to make sure your yeast is activating properly. It should look frothy and smell yeasty after 10 minutes. If not you probably need some fresh yeast.
Add in the 525 grams of flour and a pinch of salt. I flip a wooden spoon and use the top of it to mix everything together until its all incorporated into a giant ball.
Coat the same bowl with olive oil so your dough is easier to get out.
Cover with a towel or cling wrap. Let it rise on the counter for 1.5-2 hours. After that place it in the fridge. Wham-o Blam-o all of the work of kneading is done in slow motion in the fridge over the next couple of days.
Sauce Shenanigans
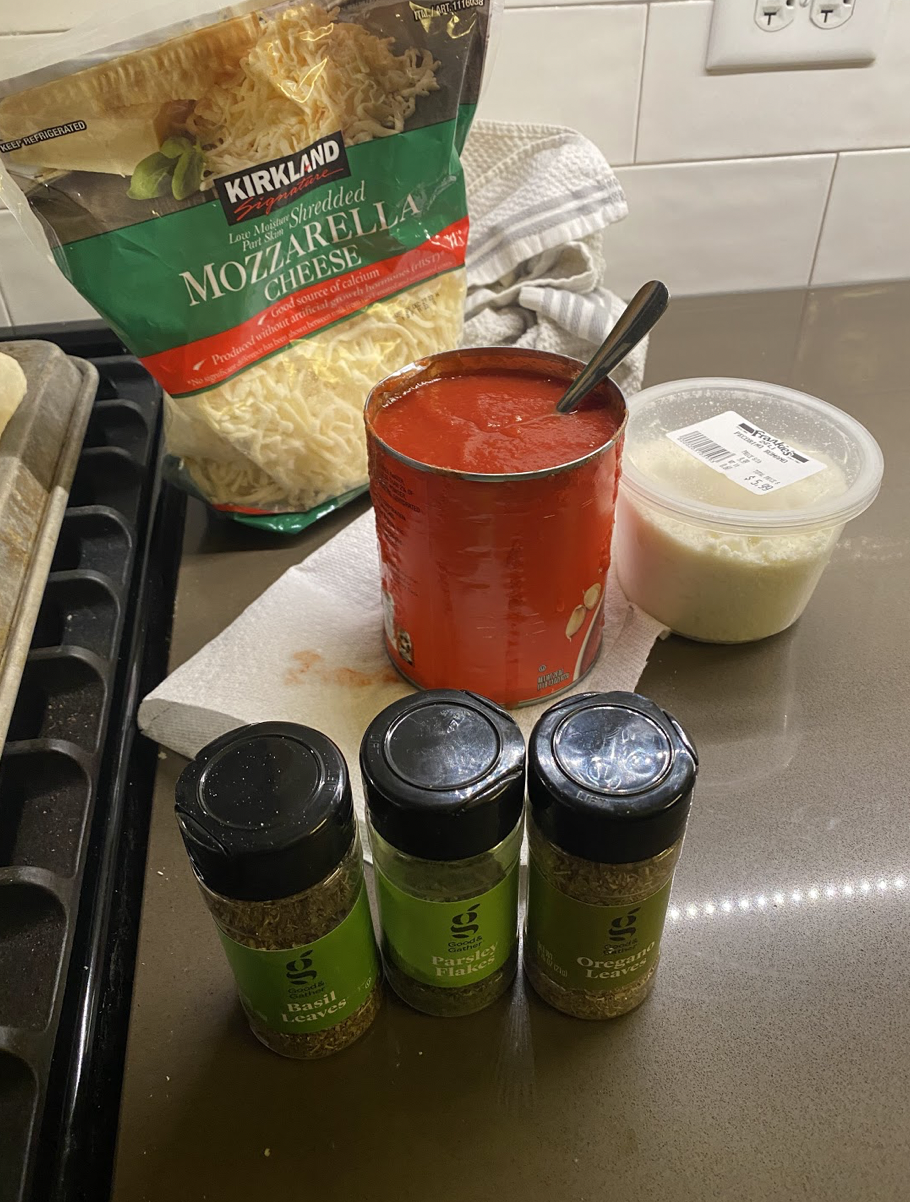
There are a lot of things you can do about this, but I keep it simple. Tomato based sauces are my favorite to use. They are a little thicker so they don’t mess with your precious crust too much and they have a ton of flavor. Here is a super simple, but amazing sauce you can make from scratch. Want something even simpler? I buy a big can of Tomato Puree and just add in 3-4 medium bulbs of fresh minced up garlic. Sorta sounds like a cooking sin, but this is all supposed to be easy. Each can gives me 6 pizzas worth of sauce. So I divide it up and freeze.
Baking the Pizza
Be sure to take your dough out of the fridge 5-6 hours before you want to bake! Sometimes I forget and that delays pizza night. No good. I wait for it to warm up (depends on the temp in your house), but right now during winter about an hour. I uncover it, wet my hand (so the dough doesn’t stick) and pull the edge from the bowl and fold it over on itself. Just to make sure everybody gets to know each other before it goes in the oven. Cover it back up and let it rise again on the counter.
One hour before baking time- Sprinkle some flour (as little as possible!) on the counter. Plop your dough ball on to the counter and quickly shape it so you can divide it in half with a knife. You can use the scale if you’d like, but I always get two pizzas that are pretty close in size just eyeballing it.
Once you have divided them in half round them into a ball and place a sticky part of the dough ball onto the counter. You want to cup your hands around the bottom of the dough ball like you are going to splash water into your face, and spin it on the counter. The tension between the dough, the counter, and your hands spinning it will seal the dough ball. Attached is a video because I have no clue how to properly explain that in writing.
After you have finished rounding out your dough balls, sprinkle a bit of flour on the counter, place them about 6 inches apart and cover with a towel for an hour.
Once your hour of waiting is up, preheat your oven to 500* F. Generously oil the backs of 2- 9”x13” baking sheets with olive oil.
Word to the wise- I am ANTI ROLLING PIN! I stretch one dough ball out in the air into a rectangle of some sort, then place it on the baking sheet and start pushing dough out towards the edge from the middle. It takes some getting used to. If the dough is giving you a hard time, place a kitchen towel over it and let it rest for 10 minutes. Once you have it in the desired shape, take a fork and poke holes all over.
After your oven reaches 500* or the highest temperature possible, place your pizza in the oven near the source of heat. I have a gas oven, so the pilot light is in the bottom. I put my pizza on the bottom rack and set a timer for 4 minutes. While that one is in the oven I start shaping the second pizza. After 4 minutes I take the first par baked crust out and place the 2nd pizza in for 4 minutes. While that crust is par baking, I top the first one.
Sauce, cheese, parmesan, oregano, parsley, and basil. Or whatever you’d like!
Now that the second crust is par baked, time to switch again. Topped pizza stays on the baking sheet for in the oven another 4 minutes while I top the 2nd pizza. Once the timer goes off the goal is to get the pizza off the baking sheet and directly on the oven grates. If you properly oiled you sheet and the crust has hit the magical point of not sticking to the pan it should slide off. If not get a spatula and slide it around the bottom. If you’re still having a hard time it might need another minute or two on the sheet. At this point I set a timer for 3 minutes, so 7 minutes total after the toppings are put on.
These times are what I have found works in my oven! You might need to experiment with your oven. Thats the fun of making pizza!
Once I decide its done in the oven I use a spatula and slide it onto a cooling rack. I put the 2nd pizza in the oven and watch that one while the 1st pizza cools.
Slice and serve however your heart desires. This pizza reheats wonderfully for lunch the next day. Set the oven to 450* F, place the pieces you’d like on a baking sheet and set a time for 5 minutes. I even reheat my pizza in the air fryer and that does just fine.


